Blog Archives
Create a Professional Web 2.0 Layout
C reate a Professional Web 2.0 Layout
In this Photoshop tutorial we’re going to learn how to create a web 2.0 layout, As we go through the tutorial we’ll deal with so many Photoshop techniques. Seems kind of long? that’s because it’s very detailed. I assure you’ll find easy to follow and to get done, just give it a try! I really have tried to explain every single thing carefully. However, if you’ve faced any problems please don’t hesitate to ask for help, just drop a comment and I’ll do my best to help.
Tutorial Details
Program: Adobe Photoshop
Difficulty: Intermediate
Completion Time: 2 hours
Combining Two Photos for New Effect
 Combining Two Photos for New Effect
Combining two photos to create a new look is a fun way to learn various techniques. We’ll learn how to use the Circular Marquee tool from the center, adjusting the opacity of a layer, creating a path from a selection and adding text along it in the process. Let’s get started.
The Incredible Pen Tool
The Incredible Pen Tool [Tutorial: Basics]
A lot of tutorials tell you to use the pen tool; this one will show you HOW to use the pen tool. Creating true vector shapes, partial pixel selections, curvature modification, and saved paths are just some of its features. This adobe photoshop tutorial is courtesy of www.kromefx.com and their PSD archives.
Video Tutorial: Photoshop Professional Photo Edit [12 minutes]
Watch Free Online Photoshop Video Tutorial: Photoshop Professional Photo Edit [Advanced]
To start, click the above video tutorial to start watching the video, visit www.tutcast.com or you can find additional tutorials on www.Planetphotoshop.com
Video Tutorial: Remove A Person From Background
Watch Free Online Photoshop Video Tutorial: Remove A Person From Background [9 minutes]
Video Tutorial: Professional Photo Edit
Watch Free Online Photoshop Video Tutorial: Photoshop Tutorial Professional Photo Edit
To start, click the above video tutorial to start watching the video, visit www.tutcast.com or you can find additional tutorials on www.Planetphotoshop.com
Video Tutorial: Basic Principles of Photoshop [50 minutes]
Watch Free Online Photoshop Video Tutorial: Basic Principles of Photoshop [50 minutes]
To start, click the above video tutorial to start watching the video, visit www.tutcast.com or you can find additional tutorials on www.Planetphotoshop.com
How it Was Made: BoxedArt Website Design
We’re proud of our new website design that has been painstakingly developed for BoxedArt.com. We’ve poured months into the design, content, and programming in order to re-launch the best possible service, and now we’re showing the secrets of how all of the eye candy was made. So without further ado, here is a step by step guide on how our shiny new layout was developed in Photoshop.
Alright, let’s start with design…

View Complete Free Tutorial – Click Here To View Tutorial
Top 10 Tips on Portrait Photography
Top 10 Tips on Portrait Photography: Adobe Photoshop
Use a lens that has a wide aperture like a 1.2, 1.4, 1.8. The 50mm 1.8 is only $100, and it is a terrific lens! My whole body of work is done with a 50mm 1.8 and a Canon Rebel XS. So with that 1.6 crop factor it becomes an 80mm lens that is a perfect perspective to take portraits!
View Complete Free Tutorial Here – Click Here To View Tutorial –>

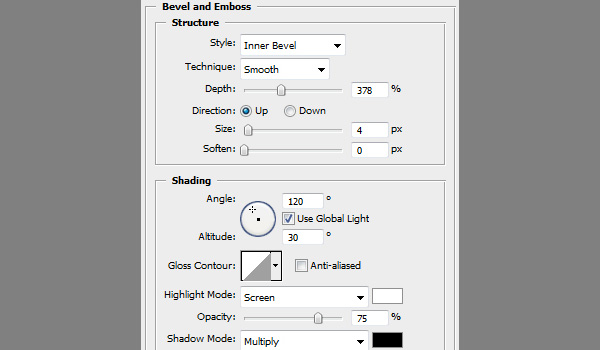
Mastering “Bevel and Emboss”
In this micro tutorial I will teach you how to get the very best out of the “Bevel and Emboss” tool that Photoshop has to offer to make your designs look ultra realistic. Before we get going there are some pointers that need to be expressed. A design can be ultra correct and still not have that realistic look to it. This is usually due to three different factors.

Click here for the free tutorial: Mastering “Bevel and Emboss” – From Beginner to Pro
